That might sound like a lot but I think once I got the cakes stacked and dirty iced, I felt that it would go smooth....and it did. For the most part.
I did make the flowers ahead of time so they can firm and dry. I baked one day...cakes and cupcakes and the evening before, I decorated the cake. Below is my process.
I knew right off that the towers would have to be made with Rice Krispie Treats but to be honest, I had no idea how I was going to do it. I imagined rolling them but as soon as I had my hands in that marshmallow mess, I knew it wasn't going to roll smooth. In hind sight, it's completely obvious how I should have done it but at the time I felt overwhelmed and a little lost.

I used a circle cookie cutter slightly smaller than the waffled cones.
(Keebler seemed to have a clean edge so I went with those)

Avoided killing my finger tips wit this trick.

Pressed it down firm.

Packed it tight in the circle before pressing it out.

A double batch made just how it says on the box.
I let it sit out over night to firm.
I used melted mini marshmallows instead of the marshmallow creme.


A random heart in the middle of my process caught my eye. It's proof my cake was made with love.
***
Next I got the cake layered with a raspberry filling I picked up from my favorite baking supply store: ABC Decorating in Orange, CA on Tustin Ave. Frosted and stacked. This is my first attempt at using a filling.

It's ugly but I think that's the point.
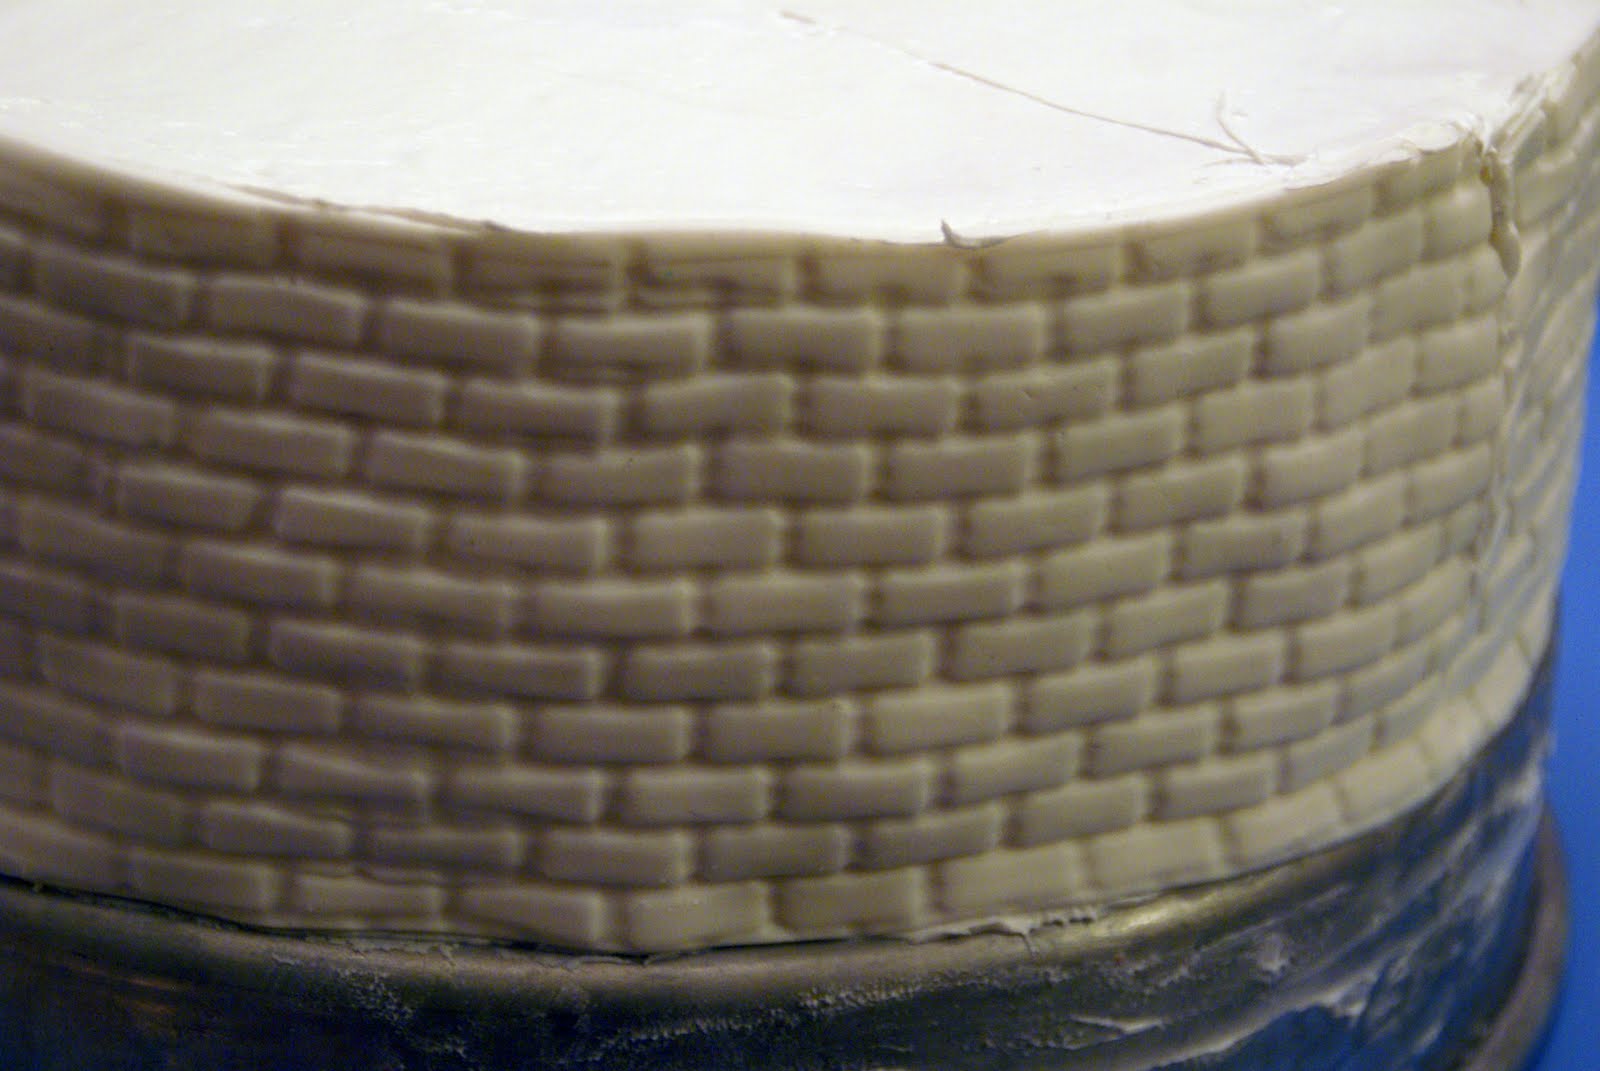


I used a small imprint of bricks. It came in a 5 set.
Marshmallow for the battlement because I was too lazy to roll fondant and cut them.
***
TOWERS!!

10" skewers broken to the lengths I desired.
I left length to go all the way up into the tip of the cone.
Some had 8, some had 9 or more.

I didn't ice them. I just rolled fondant over them.
I purposely used thinner fondant because I wanted it to look a little like brickwork.
The center towers are picked into the cake. The other towers are pressed to the cake. I wet the fondant to make them adhere to one another.

I used small tooth picks to add more support. These are later covered with vines.

Next came windows cut out of fondant I died black. They have thin lines of fondant for window panes because I could not, for the life of me, pipe a thin white line. I think I had too much caffeine in me at this point. It was about 1 am when I took this picture.

I used the left over black and twisted it up with white to give it a stone marble look. I broke off balls an roughly manipulated them into lopsided balls and stuck them to moistened fondant.
The cobblestone walkway is part of the imprint set as well as the wood grain door.
I love this castle front.

Then I added the flowers I made. I figured out how to make them from watching YouTube videos.

Rolled out vines and grass and wet the castle with a paint brush and water and they stuck right on. Windows too.
The flowers I stuck on with royal icing because it firms up and stays hard. I had a hard time getting them to stay on. They were heavier than I expected and I re-stuck them constantly.

Finished Product for one happy little girl.
***
I also made cupcakes!

Melted Chocolates hand drizzled to heart shapes.

Then stuck in the freezer for maybe 3 minutes to firm up.

Rolled fondant, cut into circles.
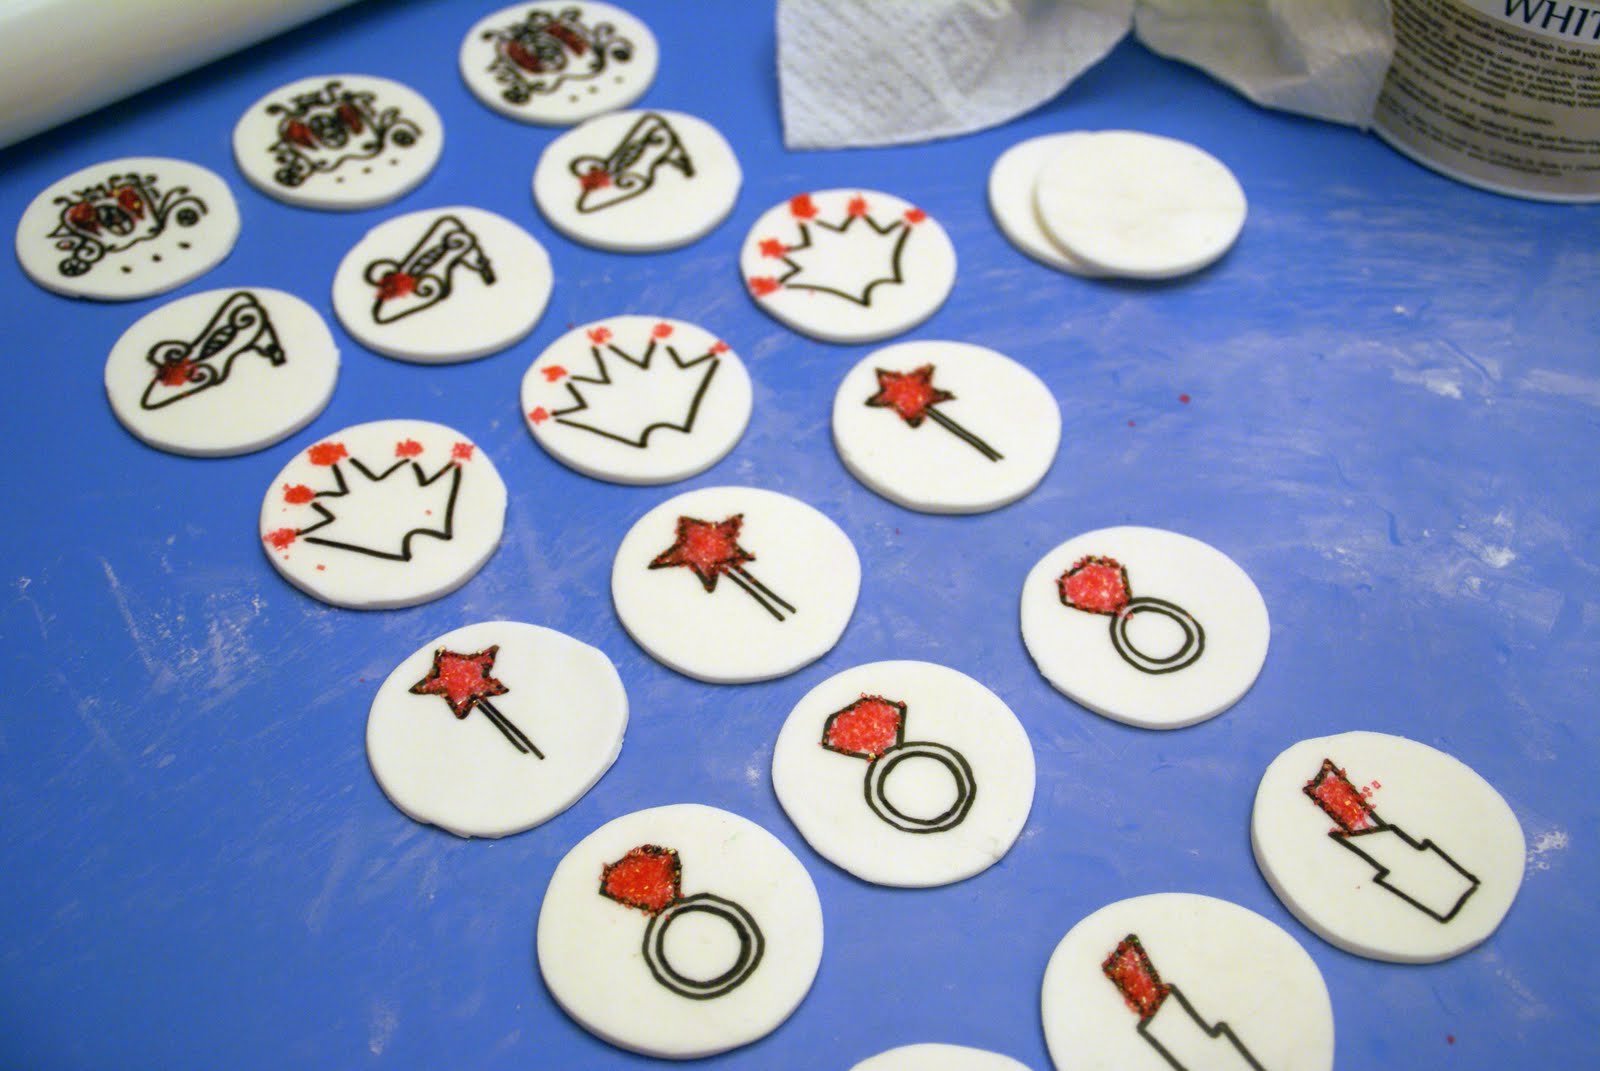
Hand drawn and sanding sugar added just to where I wanted. I found this idea on this blog:
Thank you so much for the inspiration!!!

Special Thanks to Shiloh and Sam for believing in me. And to Layla for loving all things charming. Happy 3rd birthday!!


